Go to http://www.thingiverse.com/thing:2035 to get my fixes for steps 3 and 6 (and any future problem steps I encounter) of Spacexula's Mendel Production Files. Step 3 had a few mesh holes, and in step 6, the triangular piece was slightly above the ground, causing it to be printed in midair.
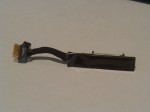
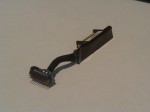
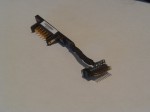
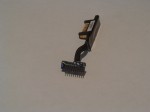
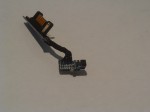
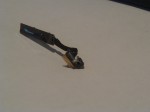
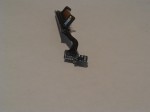
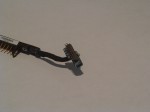
High-Resolution Pictures of the Macbook Sleep Switch/Battery Connector
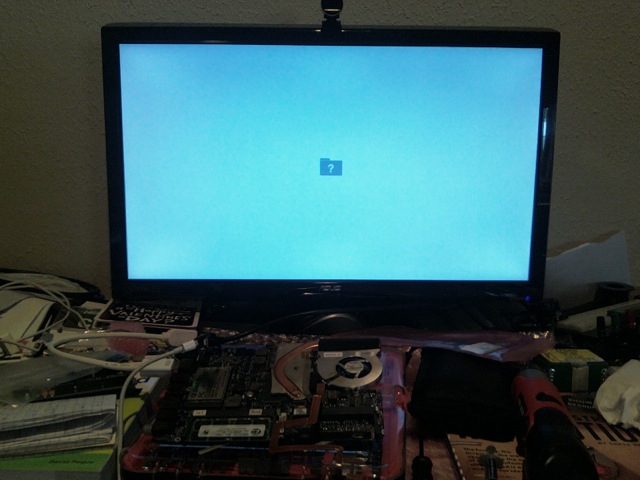
I tried figuring it out, but I couldn't get the sleep switch pinout (Apple goes to a lot of trouble to obscure the traces with the silkscreen and both my multimeters are wonky—they don't like displaying correct values). Now it's in the DIY-intosh and it still doesn't default to outputting to the external screen. I can only hope that it doesn't work for the same reason that Firewire Target Disk Mode doesn't work; OS X hasn't been installed yet.
As always, click on the pictures to see the hi-res versions.
Swapping FTDI USB to Serial Cable for Hardware Serial Works Nicely
Well, I was getting tired of having to load my prints onto an SD card by formatting, loading the file, and inserting into the MakerBot because when a print fails, I have to repeat the process. So, I finally decided to swap the FTDI USB to Serial cable for hardware serial cable. Now, I can print from the computer directly without worrying about slowdowns. It's faster because instead of relying on a driver to convert the data and push it over the USB where it is then converted into serial, it just uses the hardware serial controller, which uses a whole lot less processing power than USB does.
Here's a video showing my MakerBot workstation:
I also have it on YouTube, but YouTube makes my videos all jittery when it transcodes them. I only really use YouTube when I need to use the annotations.
My Apologies and Cellular Internet
Sorry about the downtime! That storm we just had (in the northeast US) knocked out our power for a few days, but it's back now and the server is fine.
During that time without internet at home, I went to the library to figure out how to tether my phone (use my phone's cellular modem to connect to the internet) to my computer.
More IM-ME info
Ok, I don't think I'm going to do anything with this, but to all those who've seen my previous posts and want to hack a GirlTech IM-ME, I give you this.
Confessions
Ok, in the last post about the DIY-intosh, I said that it was complete. Well, it wasn't. I really did think it was, but I was unable to install OS X. The reason? It doesn't actually think that its non-existent lid is closed. I thought the sleep switch was built into the board, but it is in fact built into the battery connector. So, after trying to emulate the switch by shorting out pins and not succeeding, I decided to take the easy way out and just buy the battery connector. $8.50 in a Best Offer on eBay; search for "Macbook battery connector." When I get the item, I'll run tests on it to find the real pinouts and I'll take a bunch of high-resolution photos of it because there are no high-res photos of the battery connector online that I could find. I think it's a hall-effect sensor and not a reed switch, and that might make things a bit more difficult, but I'll try. I'll look for a chip number. Even if I don't succeed, I'll still have some great photos so others can figure out something without needing the actual sensor/assembly.
And I'm still under my $300 goal ($293.29) :D
Edit: Oh, and it looks like PuSH wasn't working before, but there was an update for it and it's working now. Instant updates FTW.
PuSH
I just installed the PuSHPress plugin for Wordpress.org. It should increase the speed at which feed readers are notified of new posts from the blog. This post is pretty much testing the plugin.
YES! Mendel Production Acceleration!
Great news! There are now Mendel parts split into 24 MakerBot-printable plates! This is great for me, considering I'm going to try to mass-produce Mendel parts. This is great because it drastically reduces the number of times you need to Skeinforge and print a new object from 80+ to 24. I'm really excited about this!
The DIY-intosh is finally complete!
I finshed it! Many thanks to Tyler of Phantom Dev, who inspired me to do this project and who gave me the link to another mod that has a little more detail on wiring the power button. I also thank ebay for being there to host the auctions and I thank the people I bought parts from for having such awesome prices. I thank Hammerhead Technology for selling me the logic board and Apple's designers and engineers for making such a great piece of hardware and software.
Total cost of the project: $284.79
