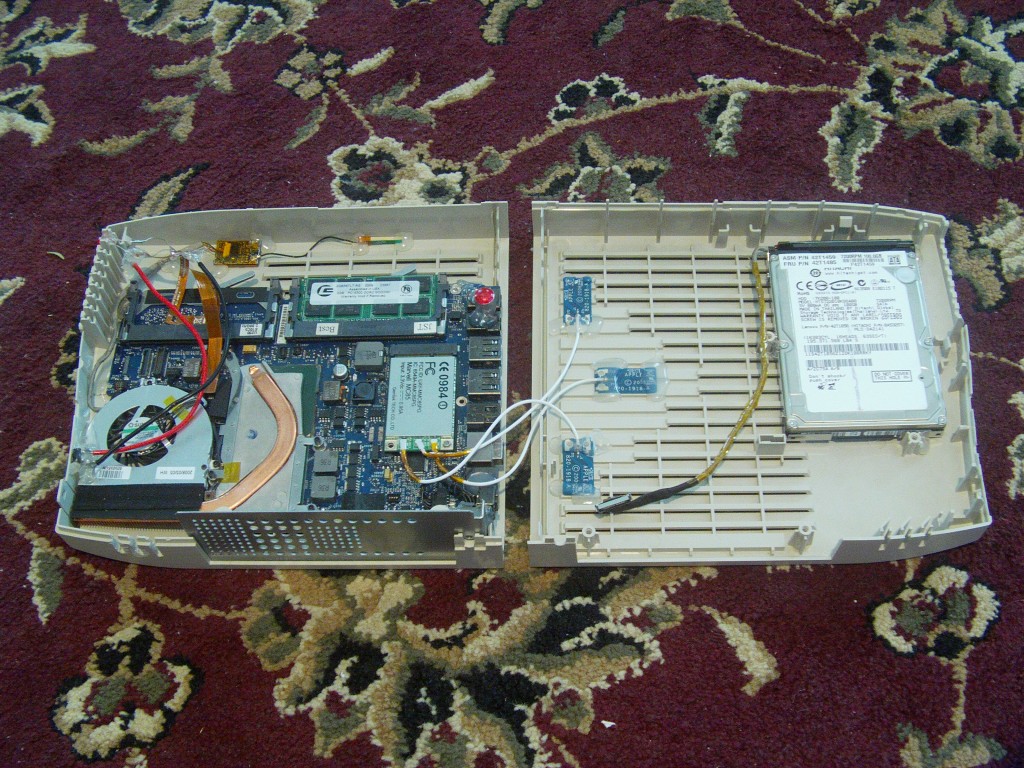
Well, I think it's about time that I made more of a how-to to build a DIY-intosh.
There are plenty of how-to's to make Hackintoshes, but those are teetering on the edge of legality, are difficult to get as stable as a store-bought Mac, and OS updates can't always be installed without any mods. Macs are supposed to be reliably stable—that's one of their main selling points; when you remove that stability, you remove a major component of the Mac. The only reasons you would want to build a Hackintosh is to have a really powerful Mac Pro at a really good cost, to have an OS X netbook, or to have a really inexpensive Mac Mini.
The DIY-intosh can be built as a really inexpensive (mine was around $300) yet still Apple-reliable Mac. Here's how to make one of your own:
Step 1: Gather Materials
- MacBook logic board
- SATA 2.5" HDD
- MacBook HDD cable
- MacBook logic board fan and heat sink with temp sensors
- MacBook sleep switch/battery connector
- MacBook DC-DC port (the power connector)
- MacBook power block
- MacBook keyboard cable
- MacBook Bluetooth card
- MacBook Bluetooth card cable
- MacBook WiFi card
- WiFi antennas
- 2GB DDR2 667 MHz laptop RAM (2 x 1GB or 1 x 2GB)
- Generic magnet to keep the sleep switch activated
- Thermal paste for heat sink
- LED
- Resistor for LED to bring the 5V to 2.5-3V (220 Ohm)
- Case to put everything in
Step 2: Make Sure the Parts Fit In the Case
Make sure they all fit when put together, otherwise you'll have serious
problems later on. If they don't fit, find a case that will let them
fit. I used an old cable modem enclosure.

Step 3: Modify the Case as Needed
This means you just need to drill holes for cooling, a power button, ports, etc.
Step 4: Secure the Logic Board to the Case
You can use either screws or glue. I used hot glue because it's easy, moderately strong, it has insulating properties, and I can remove it if necessary.
Step 5: Attach and Secure Other Parts
Attach and secure electrical components to the logic board and to the case, if needed. This includes the power switch, the DC-DC adapter, the Wi-Fi antennas, and the HDD. After you insert the sleep switch into the logic board, you can glue the magnet to the top of the switch. Make sure the magnet doesn't cause any shorts. For wiring the power switch to the keyboard cable, see what this guy posted.
Step 6: Close It Up
Close, but don't yet seal, the case.
Step 7: Install OS X
See this post for this step.
Step 8: Brag to Your Friends Celebrate the Completion of Your New Mac!
Many thanks to Tyler of Phantom Dev, who inspired me to do this project and who gave me the link to another mod that has a little more detail on wiring the power button. I also thank ebay for being there to host the auctions and I thank the people I bought parts from for having such awesome prices. I thank Hammerhead Technology for selling me the logic board and Apple's designers and engineers for making such a great piece of hardware and software.